You just picked up your car from a detail shop, walk around it in the sun, and notice something wrong. The paint shimmers with patterns that weren't there before. Some look like faint cobwebs. Others look like faint linear streaks that ripple across the hood like heat waves. These are two entirely different defects, and treating them the same way is one of the most common and expensive mistakes car owners make. Understanding buffer trails in car paint versus swirl marks is not a matter of splitting hairs. It is the difference between choosing the right fix and making the problem worse. Whether you drive a black BMW through Wheaton or a dark-gray Porsche Cayenne in Carol Stream, these defects are visible, fixable, and entirely preventable.
Table of Contents
- What Are Swirl Marks?
- What Are Buffer Trails and Holograms?
- Key Differences Between Buffer Trails and Swirl Marks
- Defect Comparison: Buffer Trails vs. Swirl Marks vs. Micro-Marring
- How to Fix Buffer Trails on Car Paint
- How to Fix Swirl Marks Properly
- How to Prevent Both Defects Going Forward
- Why a Ceramic Coating Changes the Equation
- Frequently Asked Questions
- References
What Are Swirl Marks?
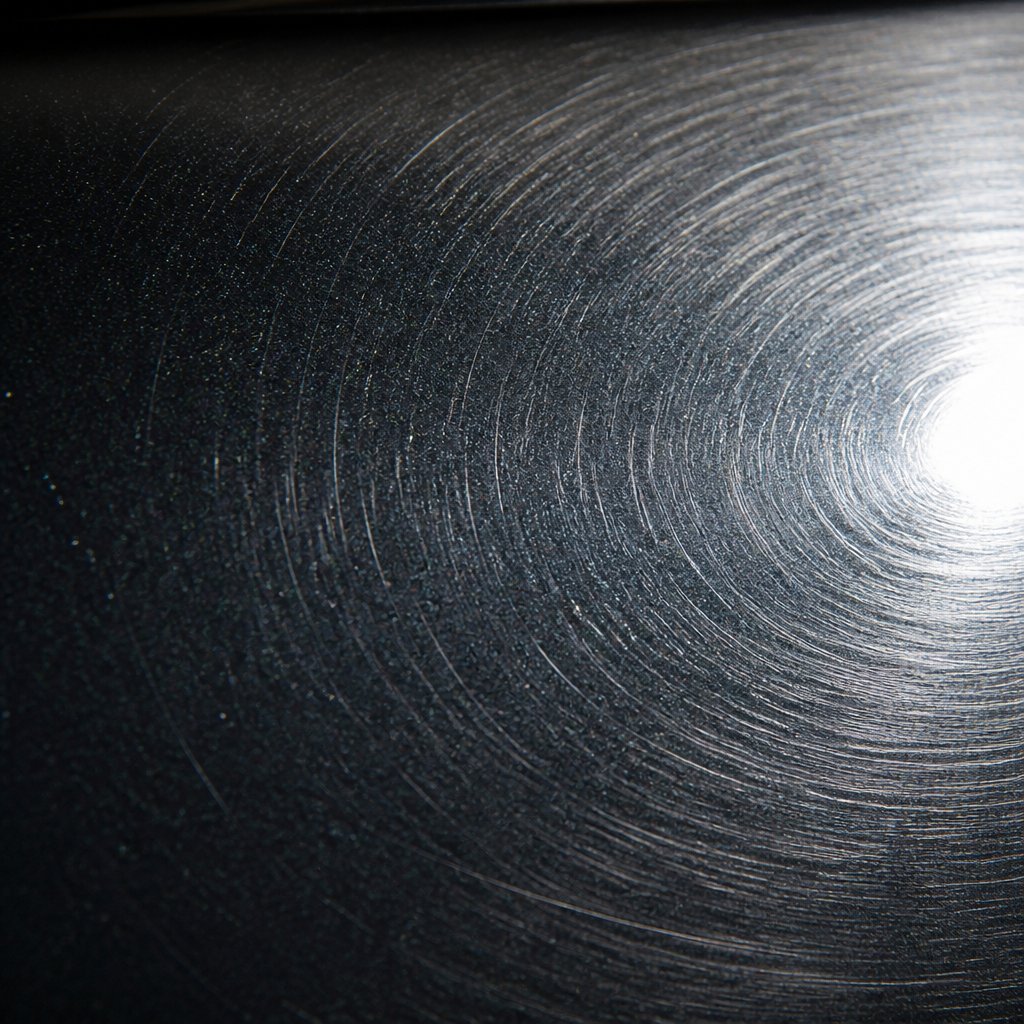
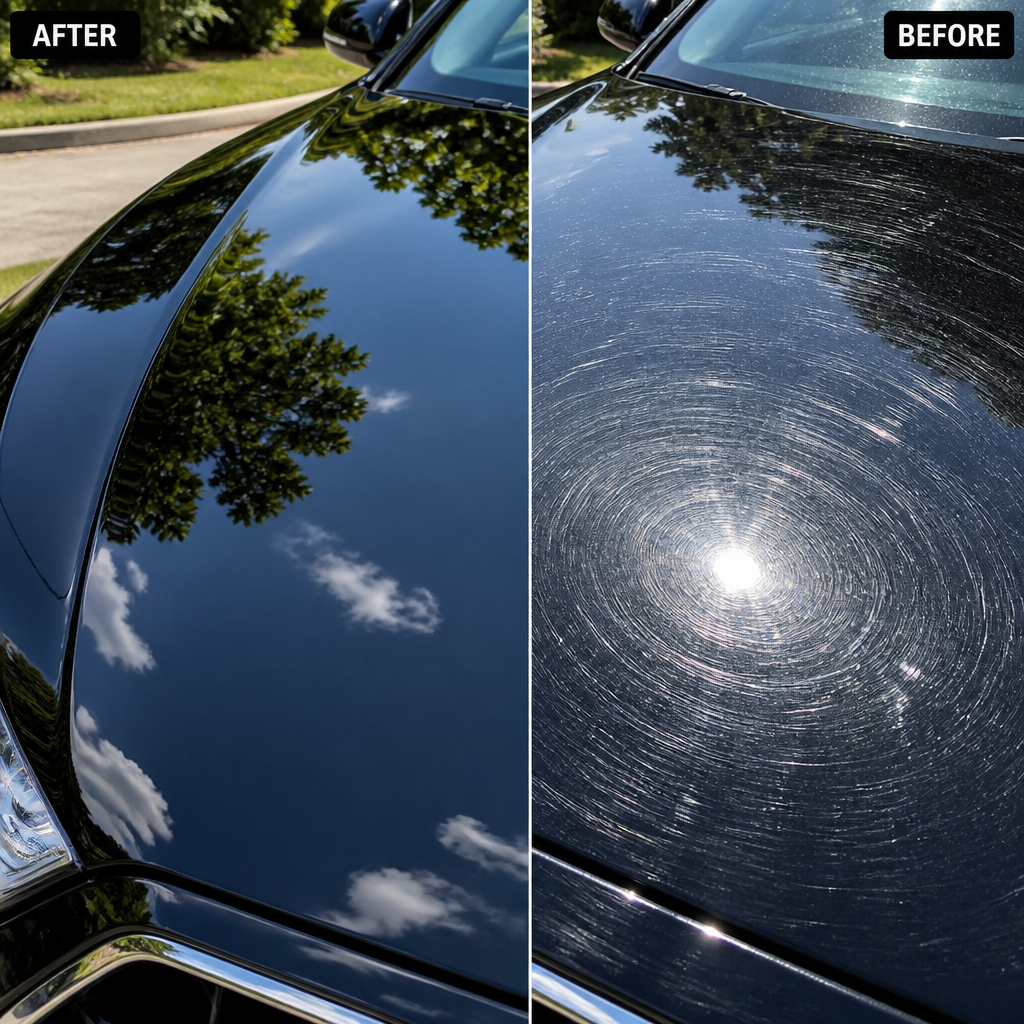
Swirl marks are fine, circular or oval scratch patterns in the clear coat that appear as a cobweb or spider-web pattern when viewed in direct sunlight or under a single bright light source. They are not actually circular by nature. The scratches run in random directions across the paint surface. They only appear to form a circular swirl pattern because the sun, acting as a single circular light source overhead, illuminates the sides of those random micro-scratches in a way that makes them reflect light in a radial pattern from a central point.
Swirl marks sit at the top of the clear coat. In the vast majority of cases they are shallow enough that a proper machine polishing process can remove them entirely by leveling the surrounding clear coat down to the depth of the scratches.
What Causes Swirl Marks
Swirl marks are almost always caused by poor wash and drying technique, not polishing. Automatic car washes with rotating brushes are a leading cause, because those brushes accumulate grit from dozens of vehicles throughout the day. Wiping a dusty car with a dry microfiber towel, using a cotton bath towel to dry paint, or dragging a dirty wash mitt across a panel without rinsing it first all deposit micro-scratches that accumulate over time into visible swirl patterns. Even using a car cover on a dirty car adds scratches with every removal.
Dark vehicles reveal swirl marks far more dramatically than light ones. On a black or dark-blue car, the contrast between the defect and the surrounding surface is at its highest. On white or silver paint, the same swirl marks exist but reflect too little contrast to be easily visible.
"Swirl marks are not a sign of cheap paint or a defective vehicle. They are an almost universal result of normal car care over time, and one of the most common issues professional detailers address."
What Are Buffer Trails and Holograms?
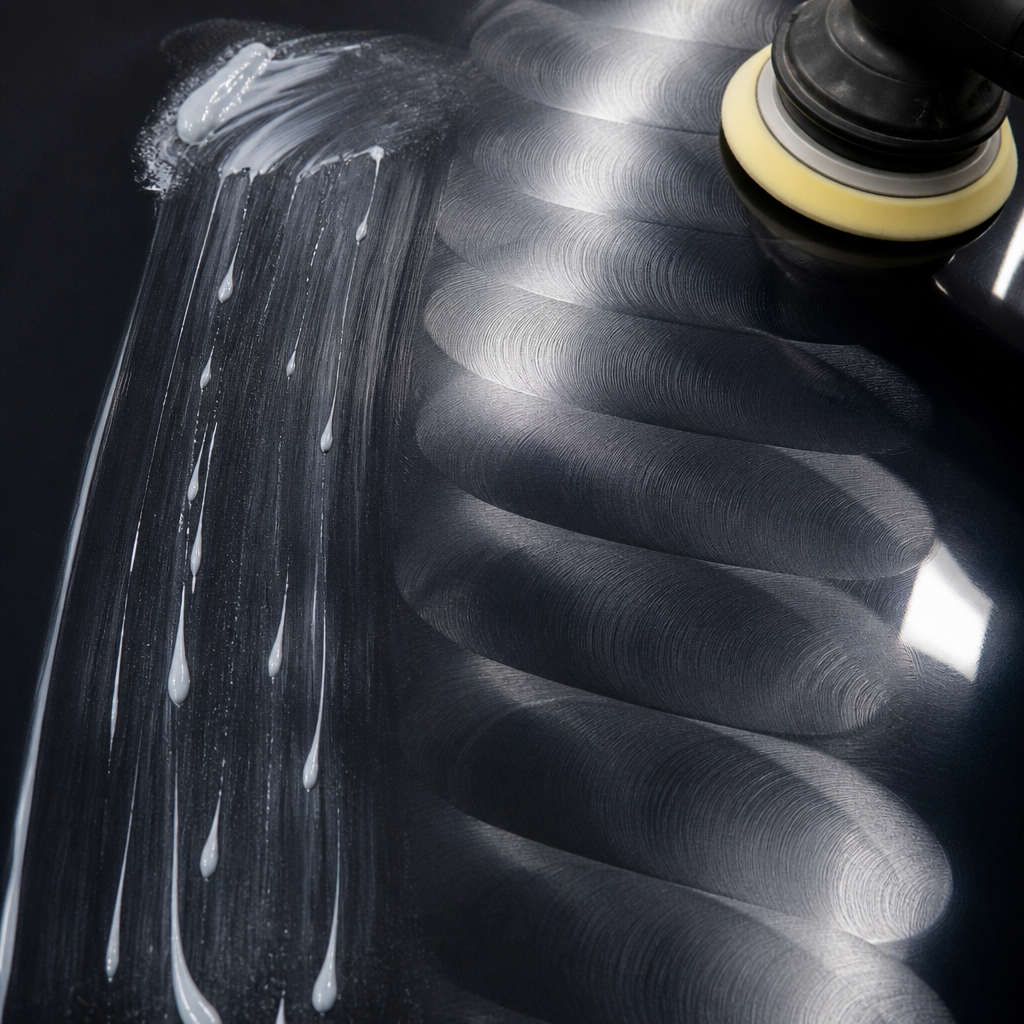
Buffer trails, also called holograms or machine marks, are a fundamentally different type of defect. They are caused by the improper use of a machine polisher, specifically a high-speed rotary buffer, rather than by washing or environmental contact. Where swirl marks look like random cobwebs, buffer trails appear as directional, linear marks or broad iridescent waves that seem to float beneath the surface of the paint. On dark panels, they can create a three-dimensional, rainbow-like shimmer that follows the path the polishing pad traveled across the panel.
Buffer trails are technically below-surface defects created by the machine itself. They are micro-scratches that a rotary polisher instills into the clear coat when its fixed circular spinning motion is combined with too much speed, an overly aggressive pad, too much pressure, not enough polishing product, or insufficient finishing steps afterward.
Why Rotary Polishers Create Buffer Trails
A rotary polisher spins in a single fixed direction at high RPM. That concentrated, consistent friction in one rotational pattern is what gives it its cutting power for aggressive paint correction. But that same fixed-direction spin means that any mistake in technique, any moment of tilting the pad on its edge, running dry, moving too fast, or skipping a refining step, imprints a repeating directional pattern of micro-scratches into the clear coat. Those repeating scratches are what catch light at specific angles and create the holographic shimmer.
A dual-action (DA) polisher oscillates and spins simultaneously in a random orbit pattern. Because no single scratch direction repeats consistently, DA polishers do not create buffer trails under normal use. This is precisely why they are the safer tool for anyone without extensive rotary experience.
Pro tip: Pro tip: If you can see a pattern in the marks, meaning they seem to track a path or repeat in linear waves, you are almost certainly looking at buffer trails, not swirl marks. Swirl marks have no discernible direction. Buffer trails do.
Who Usually Inflicts Buffer Trails
Buffer trails are most commonly left behind by high-volume body shops, dealership detail departments, and inexperienced detailers using rotary machines they are not qualified to operate. The irony is that these marks often appear on cars that were supposedly just detailed or polished. They frequently go unnoticed initially because the shop finishes the car with a glaze or wax applied over the top, which temporarily fills the micro-scratches and masks the defect until the first wash removes that wax layer.
Key Differences Between Buffer Trails and Swirl Marks
The practical distinction matters because the correction approach is different, and misidentifying the defect leads to wasted product, wasted time, and potentially more damage. Here is how to tell them apart in practice.
Pattern is the single most reliable diagnostic tool. Swirl marks form a random, multi-directional web with no dominant orientation. Buffer trails form a repeating, directional pattern that visibly tracks the movement path of a polishing pad across the panel. Under a single-point light source such as a shop light or the sun, swirl marks will create an even spider-web effect centered on your reflection. Buffer trails will create streaks or arcing waves that shift as you move around the vehicle.
Cause is the second diagnostic dimension. If the marks appeared or worsened after washing and drying, they are almost certainly swirl marks from friction during the wash process. If the marks appeared after a detail, a paint correction job, or a body shop visit, they are almost certainly buffer trails left by improper machine work.
Defect Comparison: Buffer Trails vs. Swirl Marks vs. Micro-Marring
| Characteristic | Swirl Marks | Buffer Trails / Holograms | Micro-Marring |
|---|---|---|---|
| Visual Pattern | Random cobweb or spider-web circles | Linear, directional streaks or iridescent waves | Fine, dull haze with no clear pattern |
| Primary Cause | Poor wash and drying technique, automatic car washes | Rotary polisher misuse, aggressive pads, skipped finishing steps | Light abrasion from finishing polishes or contaminated pads |
| Worst Affected Colors | Black, dark blue, dark gray, dark red | Black, dark blue, dark gray, dark red | Dark colors and soft clear coats |
| Paint Depth | Shallow, usually clear coat only | Below surface of clear coat but still within clear coat | Very shallow, top layer of clear coat |
| Correct Fix | Machine polish with DA polisher, appropriate compound, and finishing polish | DA polisher with medium cut polish, followed by fine finishing step | Finishing polish or fine refinement step with a soft pad |
| DIY Risk | Moderate. Wrong pad or compound can deepen the defects. | High. Rotary in untrained hands creates more trails. | Low to moderate with a DA polisher. |
| Wax or Sealant Fix? | No. Wax masks temporarily. Defects return after next wash. | No. Wax masks temporarily. Defects return after next wash. | No. Temporary fillers are not a correction. |
The table above makes one point unmistakably clear. Wax and paint sealants do not fix either defect. They fill the micro-scratches temporarily and create an illusion of depth and gloss that lasts until the wax layer wears or washes away. This is exactly the tactic that low-quality shops use to disguise buffer trails after a sloppy polish job.
How to Fix Buffer Trails on Car Paint
Fixing buffer trails requires machine polishing with a finishing-grade or medium-cut polish and a soft pad using a dual-action polisher. The goal is to level the micro-scratch pattern left by the rotary polisher so that no single scratch direction dominates the surface anymore. Done correctly, the paint emerges optically flat and the holographic shimmer disappears.
Step One: Thorough Decontamination Before Polishing
No polish should ever touch paint that still has surface contamination. Start with a proper two-bucket wash, follow with an iron remover to pull embedded brake dust and metallic fallout from the clear coat, and clay-bar the surface to eliminate any bonded contamination. Dragging contamination under a polishing pad creates new swirl marks while you are trying to remove the existing buffer trails.
Step Two: Test Spot First, Always
Before committing to a full panel, work a small test area of roughly 12 by 12 inches. Use the least aggressive combination of pad and polish that achieves a result. Start with a soft finishing pad and a fine polish. If the buffer trails are not fully removed, step up to a medium foam pad and a medium-cut polish. This approach protects the remaining clear coat thickness, which is finite and cannot be replaced without repainting.
Step Three: Refine After Cutting
This is the step that high-volume shops consistently skip. If you use a medium compound to cut down the buffer trails, you must follow up with a separate finishing polish and a soft pad to refine the surface back to an optically clear, defect-free state. Stopping after the cutting stage leaves behind new, finer micro-scratches from the compound itself.
Pro tip: After the final polishing step, wipe the panel with an isopropyl alcohol solution diluted to roughly 15 to 20 percent before applying any coating or sealant. This removes polish oils and fillers that can mask remaining defects, giving you a true read on the surface before committing to a protection layer.
How to Fix Swirl Marks Properly
Removing swirl marks follows the same fundamental process as fixing buffer trails, but the starting aggressiveness is typically lower because swirl marks are usually shallower. The process still begins with decontamination. Polishing contaminated paint is the single most common reason DIY paint correction creates more damage than it removes.
Choosing the Right Polish and Pad Combination
For moderate swirl marks on a vehicle in otherwise reasonable condition, a medium-grade polish with a foam cutting pad on a dual-action polisher is usually the correct starting point. Work one panel at a time, using overlapping passes at a consistent, controlled speed. Allow the polish to break down before wiping. The polish should haze and then clear as it diminishes. Do not allow it to dry completely.
The Fingernail Test for Depth
Before polishing, drag a fingernail gently across the scratch at an angle. If the nail glides over without catching, the scratch is in the clear coat and polishing will address it. If the nail catches in the groove, the scratch penetrates through the clear coat into the base coat or primer, and polishing alone will not repair it fully. Setting realistic expectations before starting prevents over-polishing and unnecessary clear coat removal.
What Hand Polishing Actually Does
Hand application of polishes or swirl removers does not correct swirl marks. It deposits fillers and oils that temporarily hide the defect for one or two washes, after which the marks reappear exactly as before. Hand polishing has a legitimate role in spot repairs on a single tight area. For any significant area of swirl marks, machine polishing is the only genuine fix.
How to Prevent Both Defects Going Forward
Prevention is always less expensive than correction. Swirl marks are prevented by improving wash technique. Use the two-bucket method, a high-quality wash mitt, clean water, a proper pH-neutral shampoo, and dry with a plush waffle-weave or twist-pile microfiber towel. Avoid automatic tunnel washes with rotating brushes entirely, especially on any vehicle you care about. Never wipe a dusty car dry without rinsing it first.
Buffer trails are prevented by one very simple rule: do not let anyone use a high-speed rotary polisher on your vehicle unless they have verifiable experience and a defined finishing process. A skilled detailer using a rotary machine follows each cutting stage with multiple refining steps. An inexperienced operator either does not know those steps exist or does not have time to perform them. The result walks out of the shop looking fine until the wax wears off after the first wash.
In the Chicago suburbs, where road salt, industrial fallout, and harsh seasonal temperature swings add environmental stress to clear coats throughout the year, maintaining a clean, properly washed surface is not optional. The more contamination that builds up between washes, the greater the friction during each subsequent wash, and the faster swirl marks accumulate.
Why a Ceramic Coating Changes the Equation
A nano-ceramic SiO2 coating applied to properly corrected paint does not fix existing swirl marks or buffer trails. Paint must be in flawless condition before the coating goes on, because the coating locks in whatever surface condition exists at application. Any remaining defects will be preserved under the coating, not filled or hidden.
What a properly applied ceramic coating does is dramatically reduce the rate at which new swirl marks and surface contamination accumulate after correction. The hydrophobic surface causes water, dirt, and road grime to sheet off rather than bond to the paint. Wash friction decreases because contaminants release more easily. Over a five to eight year warranty period, a vehicle with a quality ceramic coating maintains correction results far longer than an unprotected vehicle that will develop new swirl marks within months of any polish job.
At Hersheys Detailing in Glendale Heights, every ceramic coating service begins with a full multi-stage decontamination and paint correction process. The coating is never applied over uncorrected paint, and every surface is inspected under proper lighting before the SiO2 layer goes down. That is the only way to guarantee the results hold and the coating performs as advertised for its full warranty period. If you are looking for professional paint correction services in the Carol Stream, Bloomingdale, or Wheaton area, the correction work always comes first.
Pro tip: After a full paint correction and ceramic coating, switch to a pH-neutral, coating-safe car shampoo for all future washes. Standard shampoos with wax additives or high-alkaline formulas degrade a ceramic coating faster and reintroduce the bonding conditions that let swirl marks accumulate again.
Frequently Asked Questions
Can I tell the difference between buffer trails and swirl marks just by looking?
Yes, in most cases. Inspect the affected panel under a single bright light source, either direct sunlight or a shop light, and move slowly around the vehicle. Swirl marks will appear as a random, even cobweb or spider-web pattern centered around your own reflection. Buffer trails will appear as directional streaks or arcing waves that track a visible path across the panel. If you can see a clear direction or movement pattern in the marks, they are almost certainly buffer trails or holograms from machine work.
Will a wax or paint sealant fix either of these defects?
No. Wax and sealant products sit on top of the clear coat and temporarily fill the micro-scratches with oils and polymers, creating a short-term improvement in gloss. After the next wash, those fillers are removed and the defects reappear exactly as before. The only real fix for both buffer trails and swirl marks is mechanical paint correction using a machine polisher to physically level the clear coat surface. Any product that claims to permanently remove swirl marks through hand application is misleading you.
Are buffer trails permanent damage to my paint?
No. Buffer trails are micro-scratches within the clear coat layer, not damage that penetrates through to the base coat or primer. In almost all cases, a skilled detailer using the correct dual-action polisher, appropriate medium-cut polish, and a proper finishing step can remove buffer trails entirely. The clear coat has finite thickness, so the goal is always to use the least aggressive approach that achieves full correction without unnecessary material removal.
My car just came back from a body shop and the paint looks holographic. What happened?
You are looking at buffer trails. Body shops routinely use high-speed rotary polishers to blend paint repairs and produce a quick shine before vehicle delivery. Operators who move too fast, use too aggressive a pad, or skip the refining stages leave behind the directional micro-scratch pattern that creates the holographic shimmer. This is an extremely common outcome from body shop paint work and is correctable through professional paint correction. It does not mean the paint was repaired incorrectly, but it does mean the finishing step was not completed properly.
Do swirl marks affect dark-colored cars more than light-colored ones?
Swirl marks accumulate equally on all paint colors, but they are dramatically more visible on dark colors such as black, dark blue, dark gray, and dark red. On these colors, the sides of the micro-scratches create high contrast against the surrounding dark surface, making even light swirling appear as a heavy cobweb pattern. On white and silver vehicles, the same density of swirl marks reflects much less visual contrast and may not be noticeable until the paint is viewed at a specific angle. Dark vehicles require more diligent wash technique and more frequent maintenance detailing to keep the paint looking correct.
Can a ceramic coating be applied over swirl marks to hide them?
A ceramic coating should never be applied over uncorrected paint. The coating cures hard and locks in the surface condition at the time of application. Swirl marks or buffer trails present during coating application will be preserved under the coating, and because the cured ceramic layer is much harder than the clear coat beneath it, correcting those defects afterward becomes significantly more difficult. The only correct sequence is full paint correction first, inspection under proper lighting to confirm the surface is defect-free, and then ceramic coating application.
What is the difference between a one-stage and a two-stage paint correction for these defects?
A one-stage paint correction uses a single compound and pad combination to cut and refine simultaneously. It works adequately for light swirl marks on paint in good condition but often leaves behind its own fine micro-scratches. A two-stage correction uses a heavier cutting compound to remove the defects, followed by a separate finishing polish and soft pad to refine the surface to a true optical clarity. For vehicles with buffer trails, a two-stage process is almost always required. Attempting to remove deep buffer trails in a single stage typically means either leaving residual defects or over-polishing the clear coat with an overly aggressive product.
If your paint has been through a substandard detail job or an automatic car wash that left it looking worse than before, we want to hear about it. Share your experience below or reach out to the team at Hersheys Detailing to discuss what the right correction approach looks like for your specific vehicle.
We would love your feedback and any insights you would share with others. What perspective would you add?
References
- How holograms and buffer trails form in automotive clear coat and how to correct them using dual-action polishers
- Overview of common automotive paint defects including buffer trails, holograms, and micro-marring
- Guide to understanding machine polishing, swirl mark causes, and polisher selection
- Thirteen ways swirl marks appear in automotive paint and how to avoid creating them during polishing
- How to identify and remove swirl marks and buffer trails from automotive paint using correct machine polishing technique