You just spent thirty minutes washing your car in the driveway in Glendale Heights, and the paint looks perfect - until the sun hits it. Those water spots on the hood, those swirl marks on the door panel catching the light at the wrong angle: that damage happened during drying, not washing. Knowing how to dry a car after washing in Illinois is not a minor detail. In the Chicago suburbs, hard water, road salt residue, and temperature swings make improper drying one of the most reliable ways to wreck a paint job that still looks clean from ten feet away. This guide covers the tools, the technique, and the mistakes that turn a good wash into a paint correction appointment.
Table of Contents
- Why Drying Technique Matters in Illinois
- Quick Takeaways
- The Right Tools for Safe Car Drying
- Step-by-Step Drying Technique
- Drying Method Comparison
- Common Mistakes That Cause Swirl Marks
- Drying a Ceramic-Coated Car
- Frequently Asked Questions
- References
Why Drying Technique Matters in Illinois
The Chicago suburbs are not a forgiving environment for car paint. Water in this region tends to be hard, meaning it carries dissolved minerals that get left behind the moment a droplet evaporates on a warm surface. Water spots are not just cosmetic annoyances - they are mineral deposits that can etch into your clear coat over time, particularly on hot summer days when water flash-dries before you even reach the next panel.
Add road salt from Midwest winters, industrial fallout from the I-355 corridor, and the frequent temperature shifts from spring through fall, and you have conditions that punish lazy drying habits faster than almost any other region in the country. The cars we work on at paint correction appointments in Glendale Heights frequently show damage that started with a bath towel or a quick air-dry in the sun - not with anything that happened on the road.
Getting the drying step right is not about being overly cautious. It is the last line of defense between a clean wash and a surface that needs machine polishing to recover.
Quick Takeaways
| Key Insight | Explanation |
|---|---|
| Never use a bath towel or chamois on paint | Cotton bath towels and old chamois drag contaminants across clear coat, creating micro-scratches and swirl marks that dull paint over time. |
| Blot, do not drag | Laying the towel flat and lifting water off the surface creates far less friction than wiping. Dragging grinds any remaining particles into the clear coat. |
| Work top to bottom, every time | The roof is the cleanest panel. Lower panels and bumpers collect the most road grime. Always dry clean areas first to avoid transferring contamination. |
| Use 800+ GSM microfiber for paint panels | Higher GSM (grams per square meter) means a thicker, softer pile that lifts water without dragging. Lower-GSM towels are for glass and trim only. |
| Fold your towel into quarters | Folding gives you multiple clean, dry surfaces to work with as each section becomes saturated - reducing the temptation to keep using a soaked towel. |
| Hard water in Illinois makes timing critical | Mineral-rich water left sitting in direct sun can etch clear coat within minutes. Do not wash in full sun and do not let panels air-dry between steps. |
| Never dry a ceramic-coated car with a rough or dirty towel | Ceramic coatings are hydrophobic and shed water well, but they are not scratch-proof. A contaminated towel will still mar a coated surface. |
The single most common mistake we see from car owners in Carol Stream, Bloomingdale, and Wheaton is treating the drying step as an afterthought - something to rush through because the hard work is done. The hard work is not done until the car is dry and the towels are put away clean.
The Right Tools for Safe Car Drying
The tool matters as much as the technique. Using the wrong material on a freshly washed surface is how swirl marks happen to cars that were washed correctly.
Microfiber Drying Towels: What to Look For
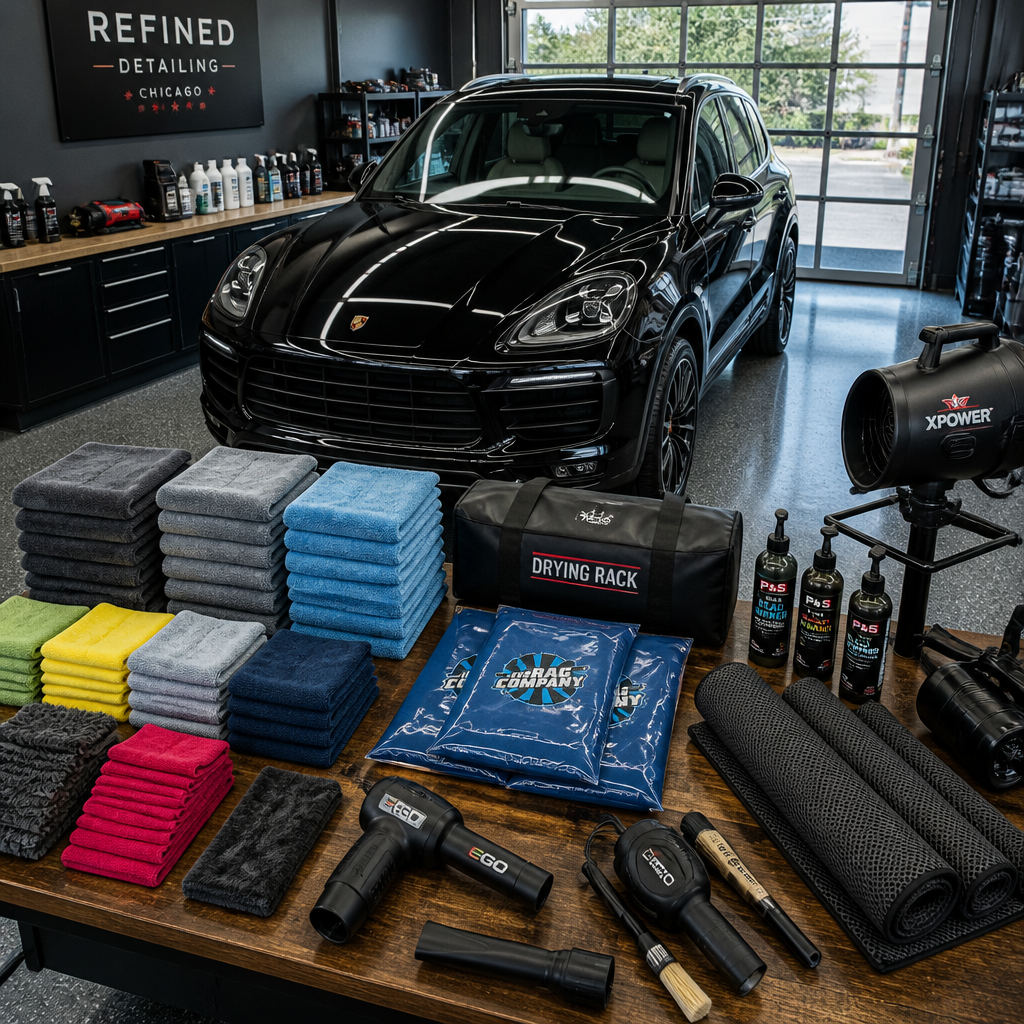
Not all microfiber is the same. GSM (grams per square meter) is the most useful indicator of a drying towel's quality for paint work. For primary drying on painted panels, a twisted-loop or plush towel in the 800 to 1,400 GSM range provides enough pile depth to lift water off the surface rather than pushing it around. Towels in this range are significantly heavier and softer than the flat microfiber cloths sold at hardware stores.
For glass, wheels, and door jambs, a waffle-weave towel works well. Its gridded texture traps water efficiently in tight spaces, and its thinner profile lets you reach into gaps and around trim pieces. Just keep it separate from your paint towels - glass and wheel towels pick up contaminants that should never touch painted surfaces.
Pro tip: A 70/30 polyester-to-polyamide blend offers good absorbency and softness for general drying. The polyamide component adds softness; the polyester component adds structure and durability. For dedicated paint drying, lean toward towels closer to 70/30 rather than 80/20, which can feel rougher over time.
Air Blowers for Hard-to-Reach Areas
An electric air blower is the single most underused drying tool in home detailing. It removes water from door jambs, side mirrors, fuel caps, grilles, badges, and every seam where water hides after a wash. If you have ever dried a car thoroughly and then watched water drip out of a door seal two minutes later, an air blower is the solution. No contact with paint means no friction and no risk of scratching.
Use the blower first on these recessed areas, then follow with microfiber on flat panels. This sequence prevents drip marks from re-contaminating panels you have already dried.
What Not to Use
Bath towels, paper towels, and old chamois leather are all off the table for paint work. Bath towels have a coarse cotton weave that scratches clear coat. Paper towels are abrasive enough to leave visible marks on soft paint. Chamois leather, once widely used, tends to drag rather than lift, and it harbors contaminants between uses. None of these belong anywhere near a painted surface you care about.
Pro tip: If a microfiber towel has hit the ground, retire it immediately from paint use. Garage floor grit is invisible but it is there, and one drag across a panel with a contaminated towel undoes everything the wash accomplished.
Step-by-Step Drying Technique
Technique is where most home detailers lose ground they gained during the wash. The steps below reflect how professional exterior detailing approaches drying - not as a final rinse-and-wipe, but as a deliberate process with a defined sequence.
Step 1: Pre-Rinse Before You Reach for the Towel
After your final rinse, do a slow sheet rinse from top to bottom. Flooding the surface with a steady flow rather than a high-pressure spray encourages water to run off in sheets rather than beading, which means less standing water to remove with your towel. This is not optional - skipping it means you are using your microfiber to do work the rinse should have done, and a soaked towel drags instead of lifts.
Step 2: Blow Out Seams and Gaps First
Before touching the paint with a towel, use your air blower on all the areas where water pools: door jambs, the gap around the fuel cap, the lower edge of mirrors, the top of the windshield where it meets the roof, and around badges. This takes two minutes and prevents the frustration of watching drips run across a panel you just finished drying.
Step 3: Fold Your Towel and Blot Top to Bottom
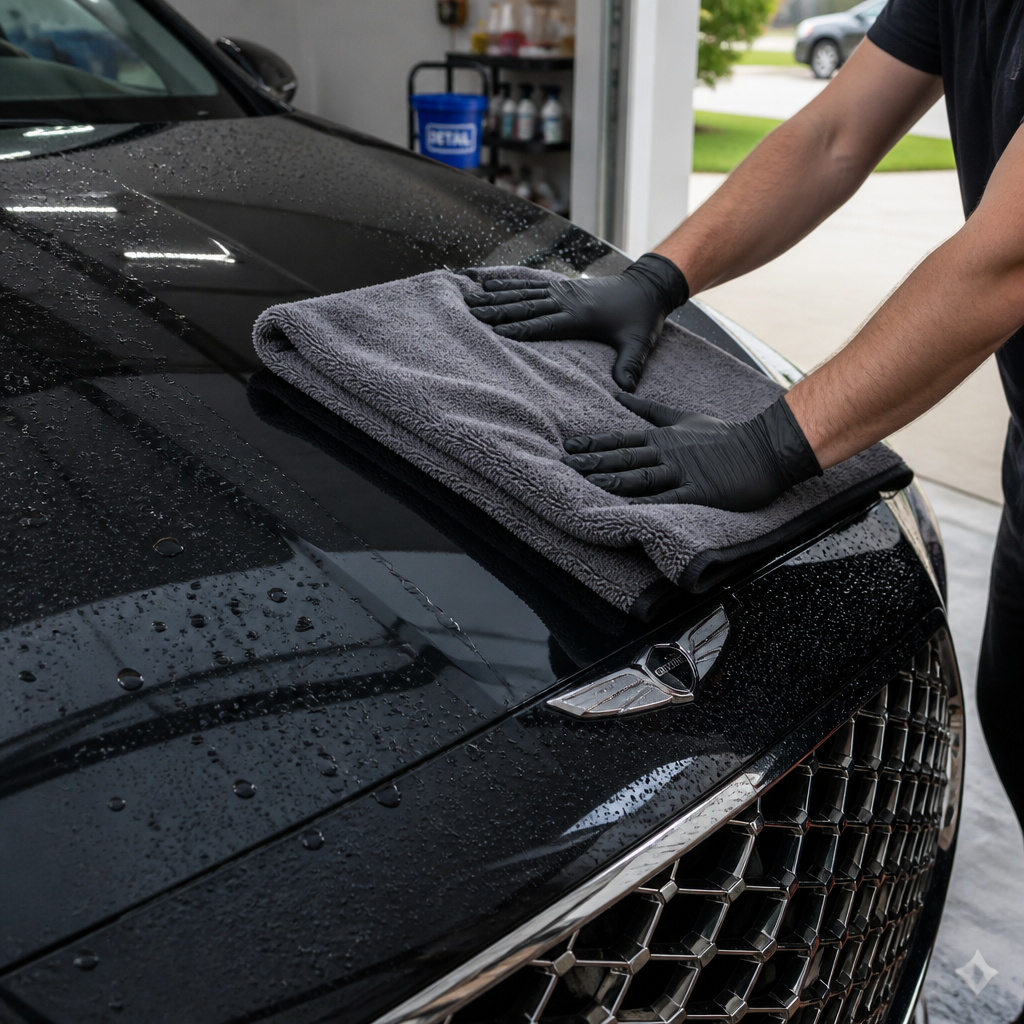
Fold your drying towel into quarters. Lay it flat on the surface and gently lift it, letting the pile absorb water without dragging. Work roof first, then glass, then hood and trunk, then door panels, then lower body and bumpers. When one quarter of the towel becomes saturated, rotate to a fresh section. When the towel is fully saturated, swap it for a clean one rather than continuing with a soaked cloth.
If you need to make a wiping motion on large flat panels, keep strokes straight and back-and-forth. Never use circular motions - circular wiping is the textbook way to create swirl marks.
Step 4: Check and Open Door Edges
Open each door, the trunk, and the hood after drying to clear any water trapped in the rubber seals and the gap between the body and the door frame. These areas drip long after the exterior looks dry. A quick pass with a small dedicated towel on the door jambs finishes the job.
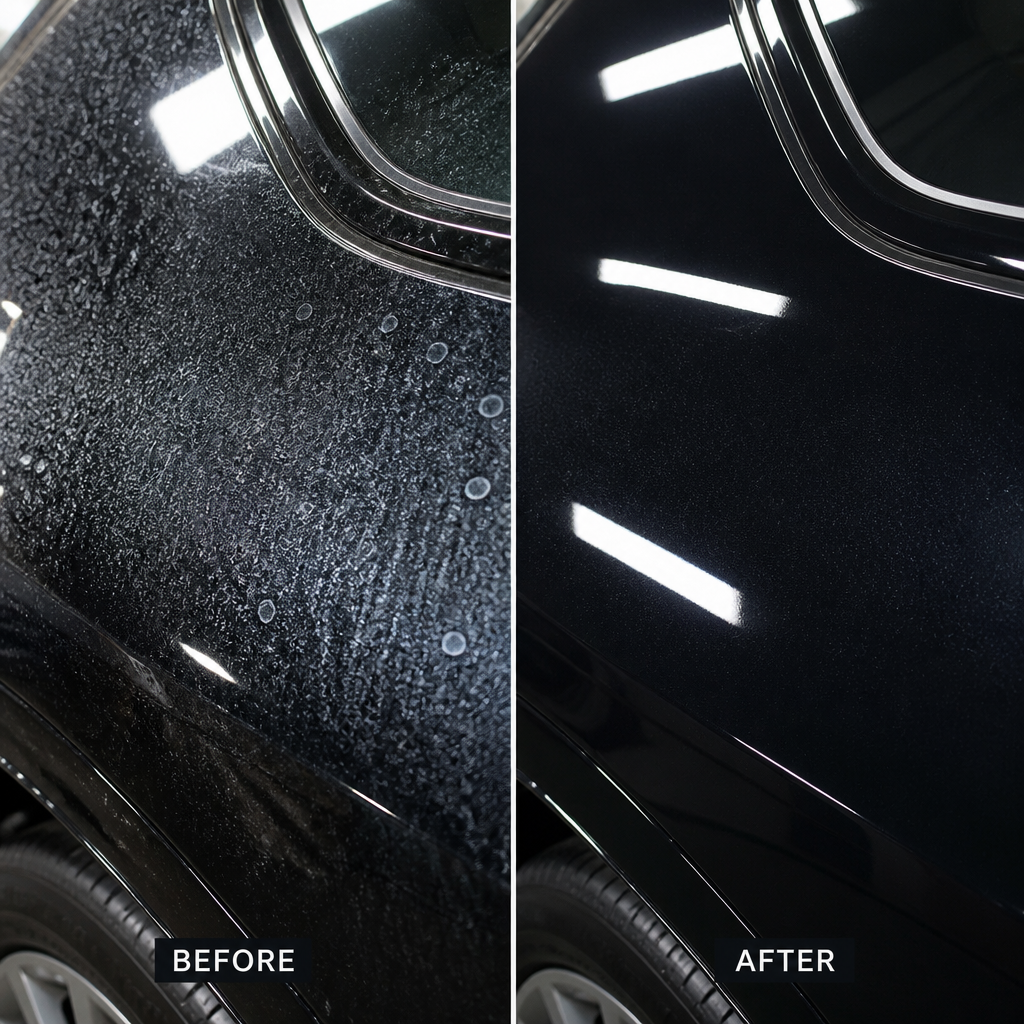
The damage from improper drying is invisible in the driveway. It shows up in bright sunlight or under a paint inspection light as a web of fine swirls across every flat panel - the direct result of friction from the wrong towel or the wrong motion.
Drying Method Comparison
Different drying tools serve different purposes. Understanding the strengths and limits of each helps you build a drying kit that matches what you are actually working with - whether that is a daily driver in Wheaton or a coated exotic in Glendale Heights.
| Drying Method | Best Use Case | Risk Level for Paint |
|---|---|---|
| Plush microfiber towel (800-1,400 GSM) | Primary drying on painted panels and flat surfaces; ideal for coated cars and dark paint | Low - when clean and used with blotting technique |
| Waffle-weave microfiber towel | Glass, wheels, trim, door jambs, and tight gaps where plush towels are too bulky | Low on glass and trim; moderate if used on paint with pressure |
| Electric air blower or filtered car dryer | Seams, badges, mirrors, grilles, and any recessed area where towels cannot reach safely | Minimal - no surface contact means no friction risk |
| Chamois leather | Legacy tool; no recommended use on modern clear coat finishes | High - drags rather than lifts; harbors contaminants |
| Bath towel or household cloth | None - not suitable for any automotive paint surface | Very high - coarse cotton fibers scratch clear coat directly |
In practice, the most effective home setup is a combination: an air blower for seams and gaps, one large high-GSM plush towel for painted panels, and a separate waffle-weave towel for glass and jambs. Keeping these tools separate and clearly labeled prevents cross-contamination between the dirtier areas of the car (lower panels, wheels) and the paint.
Common Mistakes That Cause Swirl Marks
Swirl marks are not random. They follow predictable patterns that correspond directly to specific drying habits. Recognizing these patterns tells you exactly where your process is breaking down.
Using One Towel for the Entire Car
A single towel, no matter how large, will become saturated before you finish drying most vehicles. A saturated towel stops absorbing and starts dragging water, which increases friction against the paint surface. The result is fine scratching across the panels where you were applying the most pressure - typically the hood, roof, and trunk lid. Use at least two large plush towels per wash and rotate them as they saturate.
Drying in Direct Sunlight
This mistake is common in the Chicago suburbs from late spring through early fall, when residents want to detail in the driveway on a clear day. Direct sunlight heats the paint surface, which causes water to flash-dry faster than you can reach it. The result is baked-on water spot etching that sometimes requires chemical or mechanical correction to remove. Wash and dry in shade, or work panel by panel at speed.
Skipping the Top-Down Sequence
Drying lower panels before the roof means water dripping from the roof onto sections you have already dried. That dripping water carries whatever contamination the roof picked up on the road, and now you are wiping that contamination across a panel you thought was clean. Always start at the highest point and work down.
Using Fabric Softener on Microfiber Towels
This is a maintenance mistake, not a technique mistake, but the effect shows up during drying. Fabric softener coats microfiber fibers and dramatically reduces their absorbency. Wash microfiber towels separately in warm water with a dedicated microfiber detergent, no fabric softener, and low heat in the dryer. A clogged microfiber towel is barely better than a cotton cloth, and car owners often do not realize their towels have lost effectiveness until they see the results on the paint.
Drying a Ceramic-Coated Car
Ceramic coatings change the drying process in meaningful ways, mostly for the better. A properly applied SiO2 nano-ceramic coating makes water bead up and roll off the surface, which means significantly less standing water to remove after a wash. The hydrophobic properties of a quality coating allow much of the water to sheet off during the final rinse itself.
However, a ceramic coating is not a license to use inferior tools. The coating protects against chemical bonding from contaminants, UV degradation, and light environmental fallout - but it does not make the surface impervious to physical abrasion from a dirty or rough towel. Micro-marring from coarse materials is still possible on a ceramic-coated surface, which is why we apply our coatings over fully corrected paint and advise owners to maintain the same careful drying habits afterward.
What Changes With a Coated Car
With a ceramic coating, the initial rinse removes far more water than it would on uncoated paint, so your towel work is lighter. You can often complete drying with a single pass of a large plush microfiber. Drying aids (quick-detailers formulated for coated surfaces) can be used during this pass to add lubrication and boost the coating's hydrophobic performance. Avoid silicone-based products on coated paint - they can interfere with the coating layer.
What Does Not Change
The top-to-bottom sequence, the clean-towel discipline, the separate towel for wheels and jambs, and the ban on circular wiping all stay exactly the same. A coated car is easier to maintain but it still requires proper technique. Owners who assume the coating eliminates the need for careful drying are the ones who come back for early maintenance appointments.
If your coated car is developing water spots despite correct drying habits, the issue is likely mineral content in your local water supply. The Glendale Heights and Carol Stream area water supply can leave deposits on any surface. A dedicated spray of diluted isopropyl alcohol or a coating-safe water spot remover addresses this without compromising the coating, but prevention through proper drying and shade washing is always simpler.
If you are seeing swirl marks on paint that was previously corrected or coated, the damage is permanent until addressed mechanically. Our paint correction service in Glendale Heights removes swirl marks through multi-stage machine polishing and restores the surface before any protective coating is applied. No amount of careful drying reverses existing swirl marks - prevention is the only sustainable approach.
Frequently Asked Questions
Can I use a regular leaf blower to dry my car?
A standard gas or electric leaf blower can remove water from seams and gaps without touching the paint, which is valuable. The risk is debris. A leaf blower draws air from the surrounding environment, including dust, grass particles, and garage grit, and blows it across your paint. A dedicated filtered car dryer is the safer choice because it uses a clean air intake that does not pick up ground-level contaminants. If using a household leaf blower, keep it moving and do not hold it close enough to blast debris off your own driveway onto the paint surface.
How many microfiber drying towels do I need per wash?
For a full-size sedan or SUV, plan on having at least two large plush microfiber drying towels on hand (for painted panels) plus a separate waffle-weave towel for glass and door jambs. One towel per wash is almost always not enough. When a towel saturates, continuing to use it creates drag and increases the risk of scratching. Having three or four clean towels available means you never have to make the trade-off between finishing the job and protecting the paint.
Why does my car get swirl marks even when I dry it carefully?
The most common cause is a towel that was clean before it touched paint but picked up contamination mid-session. This happens when the towel is set down on a surface (hood, trunk lid, garage floor), when the lower panels are dried with the same towel used on the roof, or when the towel was washed with fabric softener and has lost its lifting ability. It also happens when the car was not fully rinsed before drying - any residual soap or grit left on the surface gets pushed by the towel rather than lifted away.
Does ceramic coating eliminate water spots?
Ceramic coating significantly reduces the frequency and severity of water spots because water beads up and rolls off instead of spreading and evaporating flat on the surface. However, it does not eliminate water spots entirely in areas with hard water. Mineral-rich water sitting in a low spot on a coated surface in direct sun can still etch. The coating makes water spots easier to remove before they etch and reduces bonding, but proper drying habits and shade washing remain important even on coated vehicles.
Is air drying (just letting it drip dry) ever acceptable?
Not on paint you care about, and especially not in the Chicago suburbs with hard municipal water. Water that air-dries on paint leaves mineral deposits that become progressively harder to remove the longer they sit. On a hot day, these deposits can begin etching the clear coat within a single drying cycle. Air drying is the fastest way to create the water spot problem that many car owners then try to solve with polish or clay bar. The ten minutes spent drying properly eliminates hours of correction work later.
When should I hire a professional detailer instead of drying at home?
If you are already seeing swirl marks, water spot etching, or paint that looks dull despite regular washing, home drying technique will not fix what is already there. Those surface defects require mechanical correction - machine polishing with the appropriate compound and pad - before they respond to any protective treatment. If you are in the Glendale Heights, Carol Stream, Bloomingdale, or Wheaton area, a professional exterior detail or paint correction appointment addresses the existing damage and gives you a clean surface to maintain correctly going forward. Continued drying without correcting existing swirls just adds more swirls to the ones already there.
If you have a drying tip that works particularly well for your vehicle or your specific Chicago suburb setup, or if you have had a water spot or swirl problem you solved with a specific approach, share it in the comments - real-world feedback from local car owners is genuinely useful here.
References
- How to Dry a Car Properly: Blotting, Microfiber, and Technique Explained
- How to Dry Your Car Without Causing Scratches or Swirl Marks
- Best Way to Dry a Car: Expert Tips for Avoiding Swirls and Water Spots
- Car Drying Towel Guide: GSM, Weave Types, and Safe Technique
- Car Detailing Wash Guide for Indiana and Illinois: Stopping Swirls, Salt, and Hard Water Spots