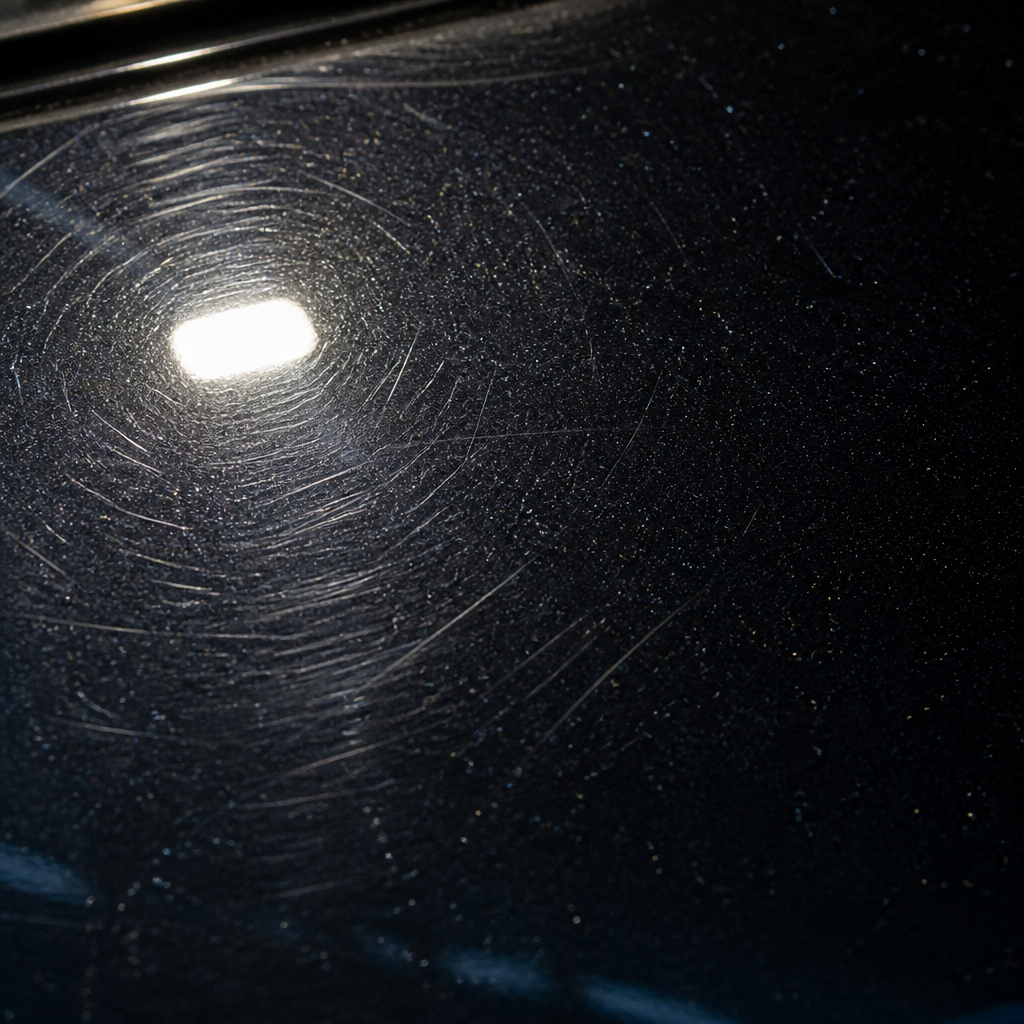
Most car owners have no idea that the swirl marks clouding their paint are not just cosmetic annoyances. They are microscopic scratches in the clear coat that scatter light and make a $60,000 vehicle look like it spent a decade in a parking lot. If you have ever wondered why your car looks dull even after a wash, stage 1 paint correction might be the answer, or you might need something far more intensive. Understanding the difference between stage 1, stage 2, and stage 3 paint correction is the single most important decision you will make before handing your keys to any detailer. Get it wrong and you pay for work your car did not need, or worse, you pay for work that falls short of what it actually required.
Table of Contents
- What Is Paint Correction and Why Does It Matter
- Quick Takeaways
- Stage 1 Paint Correction: Light Enhancement for Mild Defects
- Stage 2 Paint Correction: The Most Common Choice for Serious Owners
- Stage 3 Paint Correction in Illinois: Full Restoration for Heavily Damaged Paint
- Stage 1 vs. Stage 2 vs. Stage 3: Side-by-Side Comparison
- How to Assess Your Paint Before Choosing a Correction Level
- Why Paint Correction Must Come Before Ceramic Coating
- Frequently Asked Questions
- References
What Is Paint Correction and Why Does It Matter
Paint correction is the process of mechanically removing defects from a vehicle's clear coat using machine polishers, cutting compounds, and polishing pads. It is not a spray wax, a filler, or a quick detailer. It is abrasive work that physically removes a controlled layer of clear coat to level the surface and eliminate the scratches sitting within it.
The three stages differ in how aggressively they approach the clear coat, which compounds and pads are used, and how many machine polishing passes the paint receives. A stage 1 correction is a single-step polish. A stage 2 correction is a two-step cut and refine process. A stage 3 correction involves multiple aggressive cutting stages followed by refining passes, often requiring wet sanding on localized areas.
Quick Takeaways
| Key Insight | Explanation |
|---|---|
| Stage 1 removes light swirls and water spots | A single-step polish with a light compound and finishing pad targets surface-level defects without significant clear coat removal. |
| Stage 2 is the most popular professional choice | A cut-and-refine process using a heavier compound followed by a finishing polish eliminates 70 to 85 percent of most paint defects. |
| Stage 3 is reserved for severely neglected or damaged paint | Multiple aggressive stages, sometimes including wet sanding, address deep scratches, heavy oxidation, and severe buffer trails. |
| Clear coat thickness determines what is possible | Most factory clear coats measure between 100 and 150 microns. Removing too much risks burning through to base coat, which requires a respray. |
| Paint correction must precede ceramic coating | Applying a ceramic coating over uncorrected paint permanently locks in every swirl and scratch under a hard protective layer. |
| Not all defects can be corrected without a respray | Scratches that penetrate through the clear coat into the base coat or primer cannot be polished out. They require touch-up paint or panel respray. |
| Lighting conditions expose the true condition of paint | Inspecting paint under direct LED lighting or sunlight reveals swirl marks, holograms, and deep scratches that are invisible under cloudy skies. |
Stage 1 Paint Correction: Light Enhancement for Mild Defects
A stage 1 paint correction uses a single polishing stage, typically a light to medium compound paired with a foam finishing pad, to remove surface-level defects. In practice, this means targeting fine swirl marks, light water spots, minor oxidation, and minor buffer trails from previous poor detailing work.
This is not a maintenance wash or a quick buff with spray wax. It is a machine polishing process performed with a dual-action or rotary polisher. The key distinction is that it involves only one product and one pad combination, completing the cutting and finishing in a single step.
What Stage 1 Actually Corrects
Stage 1 is appropriate for vehicles with relatively well-maintained paint that has accumulated fine swirls from automated car washes, improper hand washing technique, or light contact. A common mistake is assuming stage 1 will remove deep scratches. It will not. If you can feel a scratch with your fingernail, it sits below where a single-step polish can reach.
At Hersheys Detailing, vehicles in Glendale Heights and the surrounding Carol Stream and Bloomingdale area that come in with paint under two years old and no history of automated washes are often strong candidates for stage 1 correction before a ceramic coating application. The correction removes the accumulated surface marring that owners often do not even notice until the paint is inspected under LED lighting.
Realistic Defect Reduction for Stage 1
A properly executed stage 1 correction removes approximately 40 to 60 percent of visible paint defects. That number is not a weakness. It reflects the physical reality of using a mild abrasive that removes minimal clear coat. The tradeoff is preservation of clear coat thickness for future correction work.
Pro tip: Before booking any correction service, have your detailer measure your clear coat thickness with a paint depth gauge. If your vehicle has already had body work or previous corrections and the clear coat reads below 80 microns in any area, stage 1 is the maximum safe option in those zones regardless of how many defects are visible.
Stage 2 Paint Correction: The Most Common Choice for Serious Owners
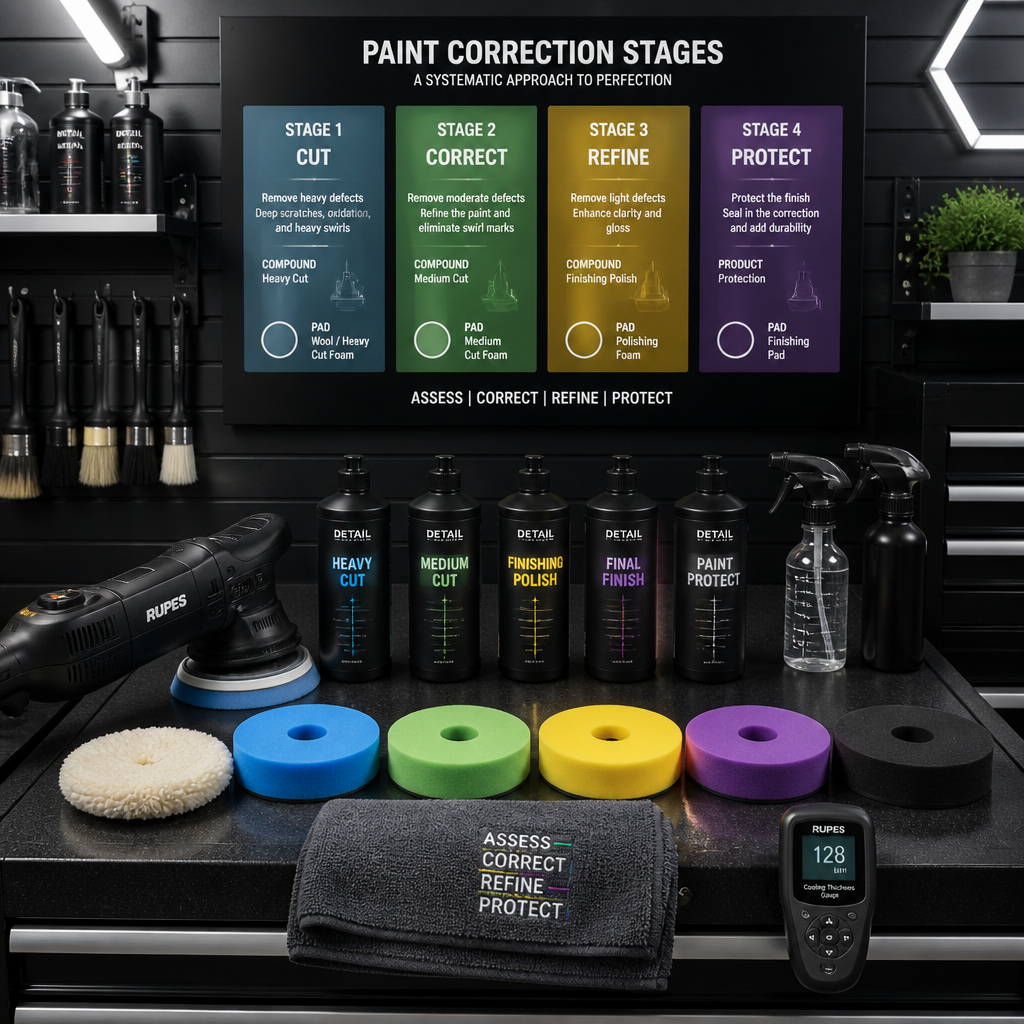
Stage 2 paint correction is a two-step process: a cutting stage using a heavier compound and a more aggressive pad, followed by a refining stage using a finishing polish and a softer pad. The cut removes defects. The refine eliminates any haze or micro-marring left behind by the cutting stage. The result is a significantly deeper level of correction than stage 1 can achieve.
This is the service most appropriate for vehicles with two to five years of wear, regular use in Chicagoland winter conditions, or a history of automated car washes. Salt-heavy Illinois roads and poor washing habits are a reliable recipe for paint that needs the full two-step treatment.
The Defect Types Stage 2 Addresses
Stage 2 targets moderate to heavy swirl marks, water etching from acid rain or hard water, light to moderate scratches, haze from oxidation, and holographic buffer trails left by previous detailers who used rotary polishers incorrectly. In practice, a well-executed stage 2 correction removes 70 to 85 percent of paint defects visible under direct lighting.
The remaining 15 to 30 percent are typically deeper scratches or isolated impact marks that exceed the safe cutting depth for the available clear coat. A reputable detailer will identify these under inspection lighting before any polishing begins and set expectations clearly, not promise 100 percent correction and deliver disappointment.
Machine Polishing Process for Stage 2
A proper stage 2 correction involves decontaminating the paint first with an iron fallout remover and a clay bar before any machine polishing begins. Skipping decontamination embeds contamination under the polish and introduces new scratches during the cutting phase. At Hersheys Detailing, the decontamination process is non-negotiable regardless of correction stage.
The cutting stage uses a dual-action or rotary polisher with a medium to heavy cut compound applied in overlapping passes across each paint panel. Once the cutting stage is complete across the entire vehicle, the detailer switches to a finishing polish and softer pad for the refining stage. Total labor time for a stage 2 correction on a full-size sedan typically runs eight to fourteen hours.
"The clear coat is a finite resource. Every correction removes some of it. A two-stage process done correctly removes significantly less clear coat than an aggressive single-stage correction pushed hard to compensate for its limitations." - International Detailing Association technical guidance on paint correction methodology
Pro tip: Ask any detailer you are considering whether they test their compound and pad combinations on a paint test panel or inconspicuous area before working the full vehicle. This is standard professional practice. If they skip this step, they are guessing at the correct cut level, and your clear coat pays the price.
Stage 3 Paint Correction in Illinois: Full Restoration for Heavily Damaged Paint
Stage 3 paint correction in Illinois is the most intensive correction process available short of a full respray. It involves three or more machine polishing stages, starting with the most aggressive cutting compounds available and progressing through medium and fine polishes before finishing with a refining stage. In severe cases, wet sanding specific panels precedes the machine polishing stages.
This level of correction is appropriate for vehicles with heavily neglected paint, severe oxidation, deep buffer trails from amateur or careless detailing, significant water etching, and paint damage accumulated over many years without protective coatings or proper maintenance.
When Stage 3 Is the Only Honest Answer
Stage 3 is not upselling. It is the honest diagnosis when paint defects are deep enough that stage 1 or stage 2 simply cannot touch them without removing so much clear coat that the remaining thickness would be unsafe for future correction or coating adhesion.
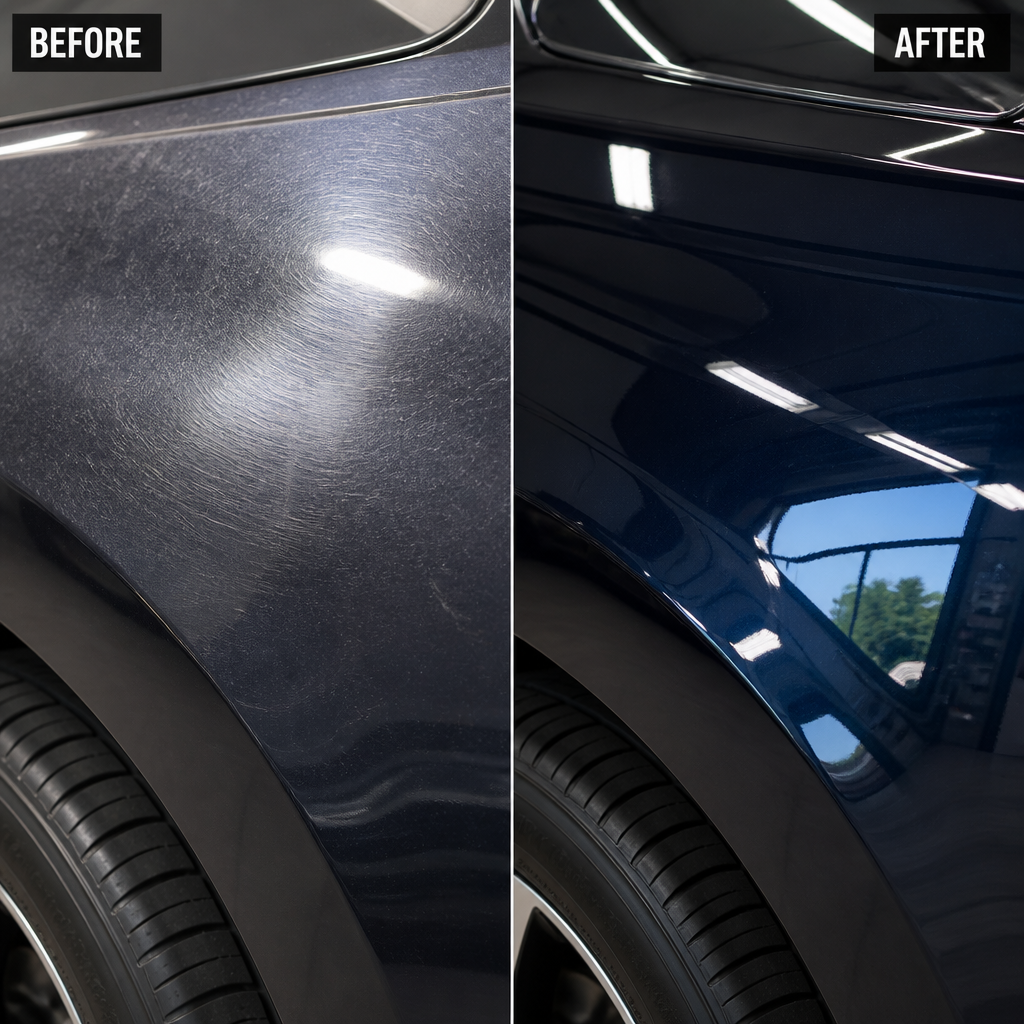
A common scenario at Hersheys Detailing involves vehicles purchased used or traded in from owners who ran them through automatic car washes weekly for years. The paint on these vehicles, particularly darker colors like black, navy, and dark grey that show swirling most dramatically, often exhibits damage so extensive that stage 2 alone cannot achieve an acceptable result for owners investing in a ceramic coating.
The Role of Wet Sanding in Stage 3
Wet sanding with 1500 to 3000 grit wet/dry sandpaper removes a controlled layer of clear coat to level the surface below deep scratches and severe texture defects. It is precise, time-consuming work. Done incorrectly, it creates witness marks and burns through clear coat. Done correctly by an experienced technician, it sets up a surface that machine polishing stages can then bring to a mirror finish.
Not every vehicle receiving a stage 3 correction requires wet sanding across all panels. Detailers apply wet sanding selectively to the most severely affected areas, then follow with full-vehicle machine polishing stages to unify the finish.
Stage 1 vs. Stage 2 vs. Stage 3: Side-by-Side Comparison
The table below compares all three correction stages across the factors that matter most when making this decision for your vehicle. Use this as a starting reference point, not a substitute for a professional paint inspection.
| Factor | Stage 1 Correction | Stage 2 Correction | Stage 3 Correction |
|---|---|---|---|
| Polishing steps | Single step: one compound, one pad | Two steps: cut compound then finishing polish | Three or more steps, often includes wet sanding |
| Defect removal rate | 40 to 60 percent of visible defects | 70 to 85 percent of visible defects | 85 to 95 percent of visible defects |
| Best suited for | New or well-maintained vehicles with light swirls | Vehicles with 2 to 5 years of accumulated defects | Heavily neglected paint, severe oxidation, deep scratches |
| Clear coat removal | Minimal, approximately 0.5 to 1 micron | Moderate, approximately 1 to 3 microns | Significant, up to 5 or more microns depending on approach |
| Typical labor time | 4 to 6 hours for a full sedan | 8 to 14 hours for a full sedan | 12 to 25 or more hours for a full sedan |
| Recommended follow-up protection | Paint sealant or entry-level ceramic coating | Professional ceramic coating, 5 to 8 year warranty | Professional ceramic coating immediately after to preserve results |
| Illinois road conditions relevance | Vehicles garaged, rarely exposed to salt or UV | Daily drivers exposed to Chicagoland winter salt and UV | Vehicles with years of exposure and no prior protection |
How to Assess Your Paint Before Choosing a Correction Level
The starting point for any correction decision is a proper paint inspection under dedicated lighting, not a glance in a parking lot. LED inspection lights, halogen shop lights, or direct sunlight at a low angle reveal swirl marks, scratches, and oxidation that are invisible under overcast skies or fluorescent lighting.
Run a clean fingernail gently across any scratch you can see. If the nail catches, the scratch penetrates through or close to the bottom of the clear coat. No amount of polishing will remove it. If the nail glides smoothly over the scratch, it lives within the clear coat and is a candidate for correction.
Using a Paint Depth Gauge Correctly
A paint depth gauge reads the total thickness of paint layers above the metal substrate in microns. Most factory paint systems measure between 100 and 180 microns total, with clear coat accounting for roughly 40 to 60 microns of that reading. Readings significantly lower than factory spec indicate prior body work, repainting, or previous paint correction that has already consumed clear coat.
At Hersheys Detailing, every vehicle receives paint depth measurements across all panels before any correction work begins. This protects the vehicle and gives the owner an accurate picture of what correction level is safe, not just what looks impressive on a menu.
What Oxidation Tells You
Oxidation, the chalky or faded appearance most visible on older red and black paint, indicates UV degradation of the clear coat itself. Light oxidation can often be addressed with stage 2 correction. Severe oxidation that has penetrated deep into the clear coat or through it entirely typically requires stage 3 correction, and in some cases a full color-sanding approach before polishing.
Why Paint Correction Must Come Before Ceramic Coating
A ceramic coating based on nano-ceramic SiO2 chemistry bonds to the paint surface and hardens into a semi-permanent protective layer. This is what makes it dramatically more durable than wax or sealant. But that same permanence is also the reason why applying a ceramic coating over uncorrected paint is a significant mistake.
Every swirl mark, water spot, and light scratch that exists in your paint at the moment of coating application will be sealed permanently beneath the ceramic layer. The defects become visible and locked in, essentially preserved under glass, and they cannot be polished out without removing the coating entirely and starting over.
Matching Correction Level to Coating Investment
If you are investing in a professional nano-ceramic SiO2 coating with a 5 to 8 year warranty, the paint beneath it must be in the best condition achievable given its available clear coat thickness. Applying a premium coating over paint that only received a stage 1 correction when stage 2 was clearly warranted defeats the purpose of the investment.
The sequence Hersheys Detailing follows for every ceramic coating job in the Wheaton, Carol Stream, and Glendale Heights area is: paint inspection and thickness measurement, full decontamination including iron fallout removal and clay bar, the appropriate correction stage, a final paint inspection under lighting to confirm results, a panel wipe with an IPA solution to strip all polish oils, and then the ceramic coating application. No shortcuts exist in that sequence.
Pro tip: If a detailer quotes you a ceramic coating without mentioning paint correction as a prerequisite or offering it as a bundled step, ask directly what condition they expect the paint to be in at coating time. The answer will tell you everything about their process standards.
Frequently Asked Questions
Can stage 1 paint correction remove deep scratches?
No. Stage 1 uses a mild single-step polish that targets surface-level defects within the top portion of the clear coat. Deep scratches that you can feel with your fingernail extend below what a single-step polish can safely reach. Those require stage 2 or stage 3 correction, and if they penetrate through the clear coat entirely, no polishing will remove them without a touch-up paint application or panel respray.
How do I know if my car needs stage 2 paint correction instead of stage 1?
Inspect the paint under direct sunlight or a dedicated LED inspection light. If you see heavy swirl patterns, visible scratches across multiple panels, water etching from hard water or acid rain, or fading and dullness that a wash cannot fix, stage 2 is almost certainly the correct choice. A professional paint inspection with a depth gauge at a shop like Hersheys Detailing gives you a definitive answer before any money changes hands.
How long does stage 3 paint correction take?
A full stage 3 paint correction on a mid-size sedan typically requires 12 to 25 or more labor hours depending on the severity of paint damage and the number of panels requiring wet sanding. On larger vehicles like SUVs and trucks, that time increases further. Any detailer quoting you a stage 3 correction in under 8 hours for a full vehicle is either misrepresenting what stage 3 means or planning to rush a process that cannot be rushed without compromising results.
Will paint correction damage my clear coat?
Executed by an experienced technician who tests compounds on inconspicuous areas, measures paint depth, and works within safe removal limits, paint correction does not damage clear coat. It removes a controlled amount of it by design. The risk comes from detailers who use overly aggressive compounds, skip the depth measurement step, or make excessive passes on thin areas. This is why measuring paint thickness before starting is non-negotiable professional practice.
Does paint correction last permanently?
The physical correction of defects is permanent in the sense that the removed material does not regenerate. However, new defects accumulate from continued driving, washing, and environmental exposure. Without a protective coating applied immediately after correction, new swirls and contamination will begin reappearing within weeks of normal use. A professional ceramic coating applied after correction is the only way to preserve the results for years rather than weeks.
Is stage 3 paint correction worth the cost for an older vehicle?
The honest answer depends on the vehicle's remaining clear coat thickness and the owner's goals. If clear coat measurements show enough safe thickness remaining and the owner wants to restore the paint rather than replace panels, stage 3 correction can deliver a dramatic transformation that costs significantly less than a full respray. If the clear coat is already compromised and thin, the cost-benefit shifts toward respray as the more durable solution. A paint depth gauge reading before making that decision is essential.
If you have had paint correction work done on your vehicle and you are willing to share what stage was recommended and whether the results matched your expectations, that information helps other owners in the Chicago suburbs make better decisions before booking.
We would love your feedback and any insights you would share with others. What perspective would you add?
References
- Statista automotive aftermarket data and industry statistics for the United States
- Forbes coverage of automotive care, vehicle maintenance costs, and resale value factors
- United States Environmental Protection Agency guidance on vehicle paint systems and chemical exposure in automotive services
- National Highway Traffic Safety Administration vehicle standards documentation including factory paint and coating specifications
- SAE International technical papers and engineering standards on automotive coatings, clear coat chemistry, and paint performance testing